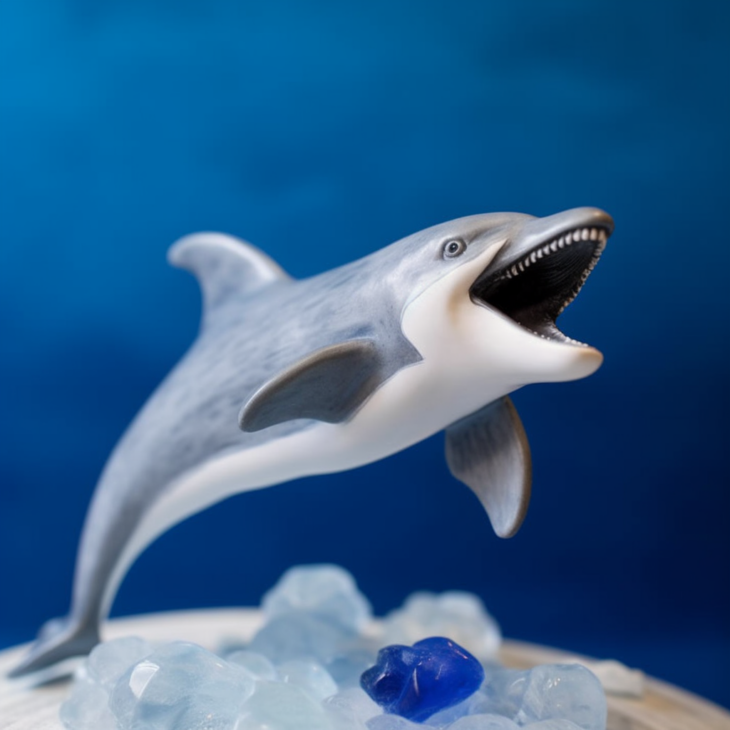
The art of sculpting with polymer clay opens up a realm of possibilities for artists to bring their imagination to life. Among the countless subjects that can be transformed into intricate sculptures, dolphins stand out as one of the most enchanting and beloved marine creatures. In this comprehensive guide, we will explore the steps and techniques involved in crafting a lifelike dolphin from polymer clay.
To embark on this artistic endeavor, you will need a selection of essential materials. Firstly, gather various shades of polymer clay that will form the body and features of the dolphin. Additionally, acquire sculpting tools, such as blades, needle tools, ball styluses, and shaping tools, to add detail and texture to the sculpture. A work surface, an oven for baking the clay, and sandpaper for refining edges are also necessary for a smooth sculpting process.
Once you have assembled your materials, the first step is to condition the polymer clay. Knead and manipulate the clay until it becomes soft and malleable, ensuring that any air bubbles or inconsistencies are eliminated.
Next, begin forming the body of the dolphin by rolling and shaping a piece of clay into an elongated form that represents the basic structure of the creature. Pay close attention to the proportions and curves of the dolphin’s body, as these details will contribute to its lifelike appearance. Utilize sculpting tools to add depth and definition to the body, creating subtle curves that emulate the smooth contours of a real dolphin.
The next phase of the sculpting process involves creating the dolphin’s iconic features, such as the dorsal fin, pectoral fins, and flukes. Roll out thin sheets of clay in appropriate colors and cut out the necessary shapes to construct these elements. Attach them to the body with a small amount of liquid polymer clay or adhesive, ensuring that they are securely in place.
The dolphin’s expressive face is one of the most crucial aspects of the sculpture. Pay special attention to the placement and shaping of the eyes, nose, and mouth to capture the spirit and personality of these intelligent creatures. Delicately sculpt fine details like the blowhole and the mouth line, ensuring that the dolphin appears to be gracefully gliding through the water.
To add texture and realism to the dolphin’s skin, use your sculpting tools to create gentle lines and grooves that mimic the natural patterns found on dolphin’s bodies. Take inspiration from reference images or observations of real dolphins to ensure accuracy and authenticity in your design.
With the basic structure and features in place, it’s time to add the finishing touches to your polymer clay dolphin. Refine the edges and smooth out any imperfections using sandpaper or a fine-grit emery board, creating a polished and professional finish.
Once your sculpture is complete, follow the baking instructions on your polymer clay’s packaging to cure the piece in the oven. Be patient during the baking process, as this crucial step will ensure the durability and longevity of your artwork.
After the dolphin has cooled, consider enhancing its beauty with a touch of paint or varnish. Applying subtle colors to the sculpture can add depth and bring out the texture, while a layer of varnish will give the dolphin a glossy finish and protect it from external elements.
In the end, you will have a breathtaking dolphin sculpture that radiates elegance and captures the spirit of these magnificent marine creatures. Display your creation proudly, whether on a shelf, as a centerpiece, or as part of an underwater-themed art installation. Your polymer clay dolphin will serve as a testament to your artistic talent and the beauty of the natural world.
Sculpting a dolphin from polymer clay is not merely an artistic endeavor. It is an immersive experience that allows you to connect with the grace and beauty of these fascinating creatures, while also showcasing your skills as a sculptor. So, dive into the world of polymer clay art and let your creativity swim alongside these majestic dolphins.


